Mini Lighted Shadowbox Vignettes Tutorial

I don't know about you but i like to save the scraps that are left over from my Mini Album projects. After all, we spend a good amount of money on some of these collections so we should find other ways to use them. The most obvious 'go to' for our scrappy bits are greeting cards, but what other uses are there? Did you know that small vignettes have become popular in the last few years? Mixed Media Artists, like Tim Holtz, get to really show off their talent and imagination by making small display pieces with different themes.

Inspired by this, I thought I could use my saved bits and pieces to make these mini shadowbox type vignettes, which would be a fun little gift idea for an older child or for someone who has a holiday tree they keep up year-round. They could even be used as a tag, of sorts, to accompany a gift. How about personalizing them using a photo of a friend or family member as the star of the show? Go a step further and add some tiny LED lights from ChibiTronics like I did!
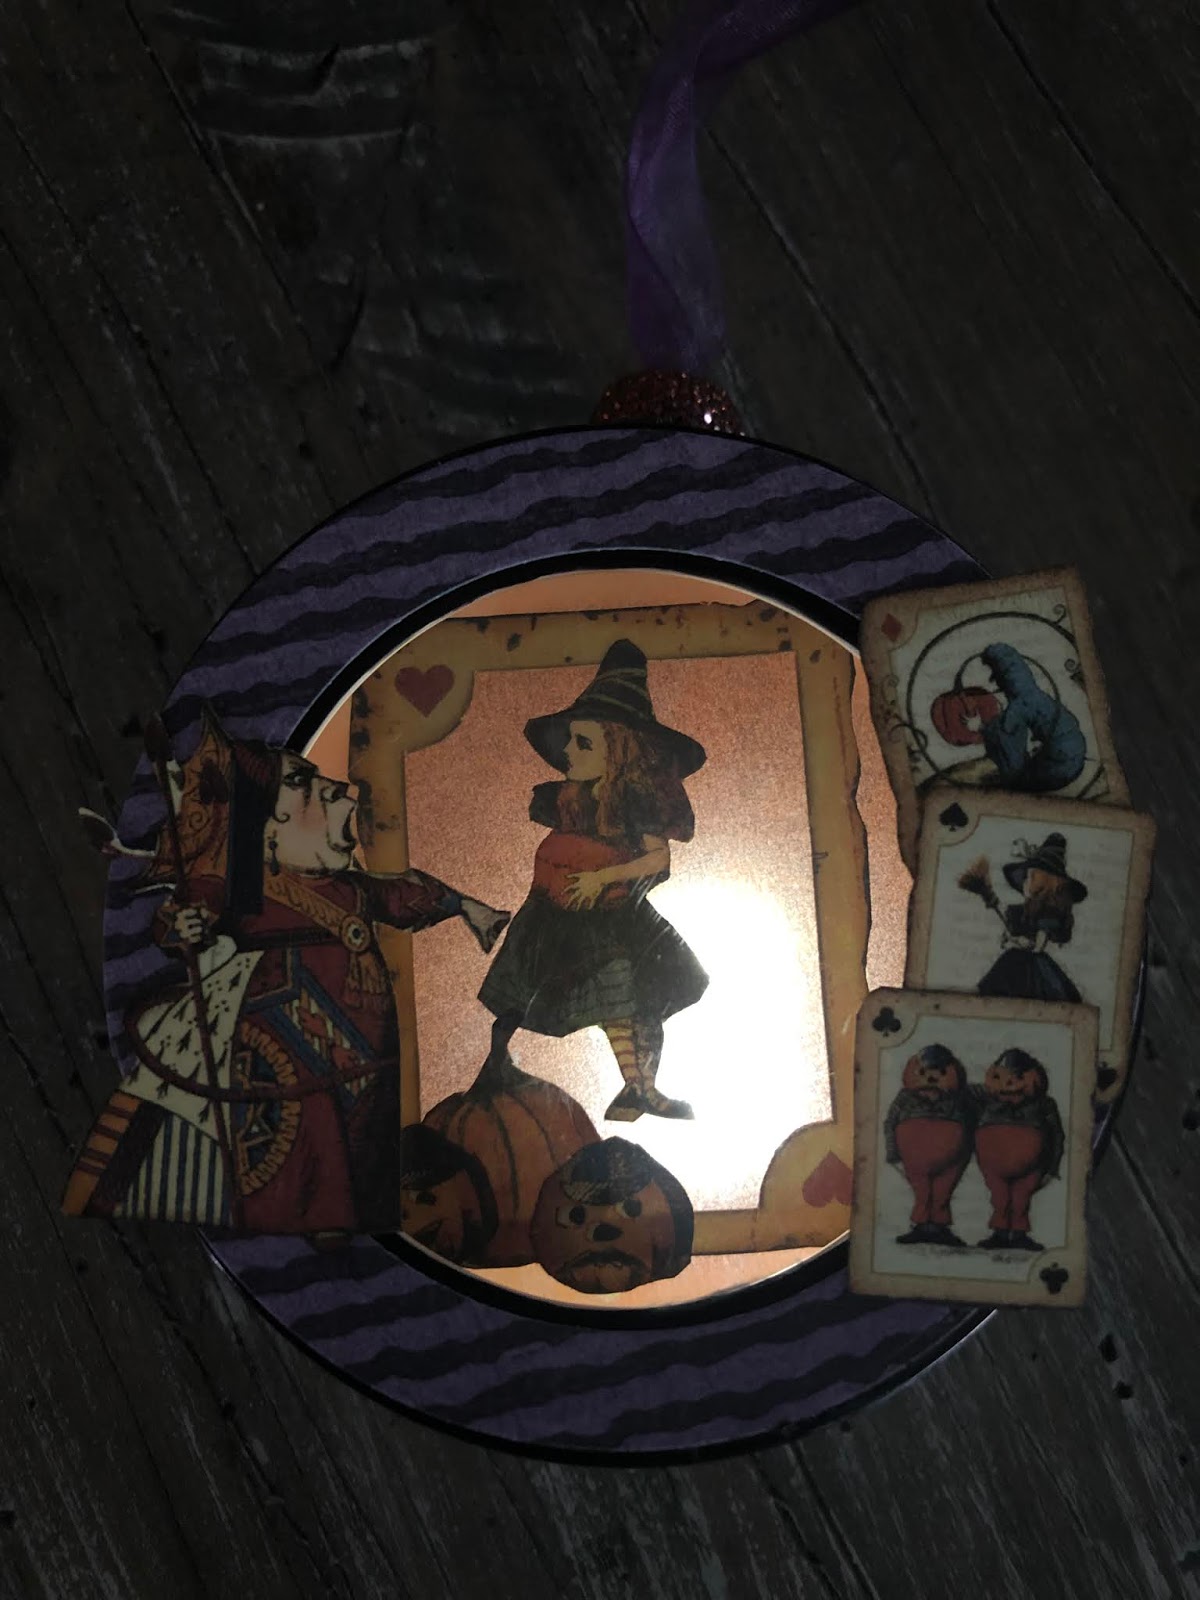

In the video below, I'll give you step by step instructions on how to make these mini shadowboxes using clear lid, aluminium tins from BeeBeeCraft. BeeBeeCraft is a good source for various craft supplies with reasonable pricing. Be sure to scroll down when the video is over for a list of the supplies you'll need for this project!
Enjoy and have fun!
Stacey
List of Materials
Designer paper scraps
Vellum, Tracing Paper or Glassine
Glue, fast drying, permanent adhesive like Fabri-Tac or Glossy Accents
Cardstock
Medium weight chipboard
Scissors
Circle cutters, circle dies or circle templates
ruler
tape
Optional- ink pad, ink dauber, ribbon, beads, awl
For adding lights you'll also need the following
Chibitronics copper tape
Chibitronics LED lights
-you can purchase these individually or as a kit on their website
CR2032 batteries
Brads
Swing Tabs
Awl
Adhesive dots
1/2 in. hole punch
Permanent marker
Small wire cutters
Small pliers with a flat head, or jewelry crimps


Comments
Post a Comment